
|
Main /
UsingEJSWithMoodleSince version 4.37 (build 121201 or later), EJS introduces new features for embedding its applets into a Moodle course. Since version 5.0, you can also add EJS javascript simulations to Moodle. This page will show you how to benefit from these new capabilities. To see an example of what can you do by combining Moodle and EJS visit http://unilabs.dia.uned.es What's this all about?Moodle is a learning management system that lets educators create online courses with a focus on interaction and collaborative construction of content. EJS simulations can now be added to Moodle courses, as activities, in a really easy way. This new feature couples the advantages of the EJS simulations with the course management facilities of Moodle. Video TutorialsWhat is EJSApp? EJSApp: Core Plugins EJSApp: Collaborative Sessions Remote Labs and the EJSApp Booking System UNEDLabs: A Network of Virtual and Remote Laboratories Open Source Physics Plugin: Access to the ComPADRE digital library directly from Moodle Export your simulation from EJSIn EJS, you only need to export the simulation as a JAR file (if you are working in the Java mode) or as a html + js file (if you are working in the Javascript mode). For this:
Use the required Moodle pluginIn Moodle, you will need to install a plugin in order to make things work. Follow these steps:

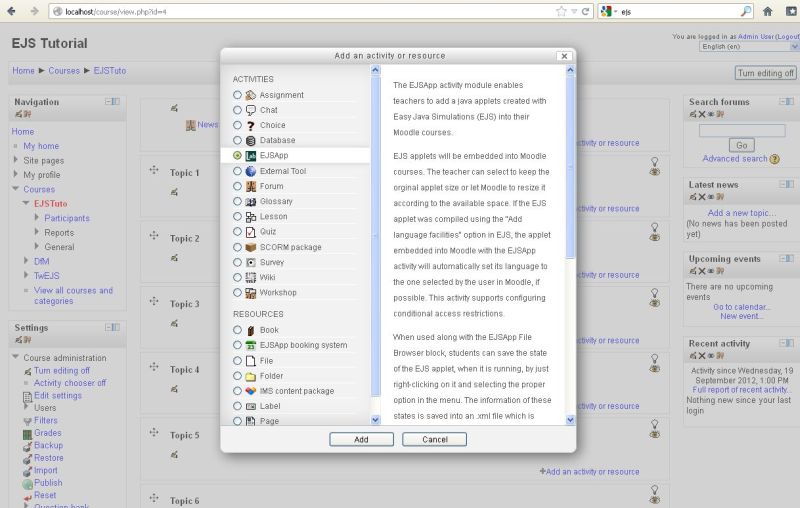 Important! For Unix Moodle servers (e.g., Linux and Mac systems), EJSApp requires that (i) the apache user is the owner of the "jarfiles" dir inside the "ejsapp" dir, and (ii) it has permissions to read, write and execute the jarfiles dir. Advanced featuresSaving/loading files from EJS into MoodleAn EJS applet added to a Moodle course using the ejsapp plugin, will be automatically able to save files (either plain text, images or simulations state files in .xml format) to a private files repository block of Moodle. However, you will need to download and install the EJSApp File Browser (download from Moodle, download from Github) Moodle plugin. Note this is a block plugin (not a module) and so, it should be placed inside the /blocks folder of Moodle. Again, you can obtain more information about installing Moodle plugins here. This block can be added to your Moodle site as any other block in Moodle. More information about blocks can be found here. There are four ways you can send data from an EJS application to the EJSApp File Browser block:
And there are three ways you can read data (text or .xml files previously stored in the EJSApp File Browser block) with an EJS application:
EJS and Moodle will take care of the rest! ATTENTION: In some operating systems, applets are required to be signed in order to allow them to save files. Finally, when you save an .xml simulation state file, the EJSApp File Browser will identify and mark it in a different way (with the  Users fo an EJS applet in Moodle can also load simulation states directly from the application rather than clicking on them in the EJSApp File Browser block. This is done by right-clicking over the simulation and selecting the option State input/output and then Read state in the menu. This actually calls the EJS native method _readState().  After that, a new menu will open, showing all the state files saved with that ejsapp activity. Select one, press the Accept button and the state will be loaded. 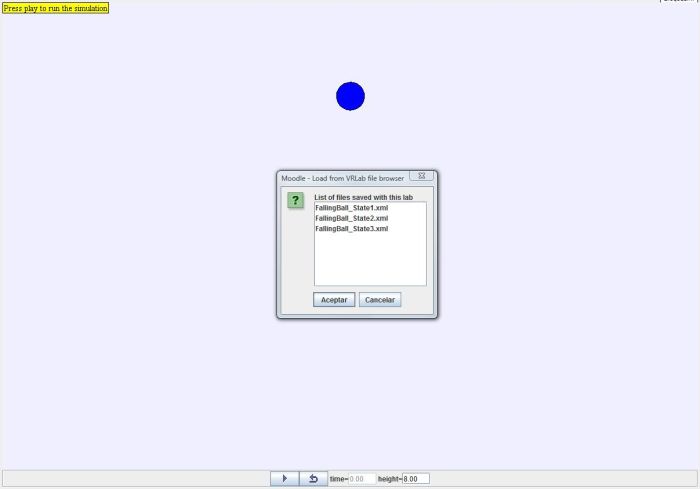 Collaborative sessions with EJS in MoodleEJS applets added to a Moodle course using the ejsapp plugin, can support synchronous collaborative work. To obtain this feature you just need two things: 1) Go to the Information menu of EJS, select the Run options tab and mark the Add support for collaborative applets before packaging your EJS simulation ar a JAR file. 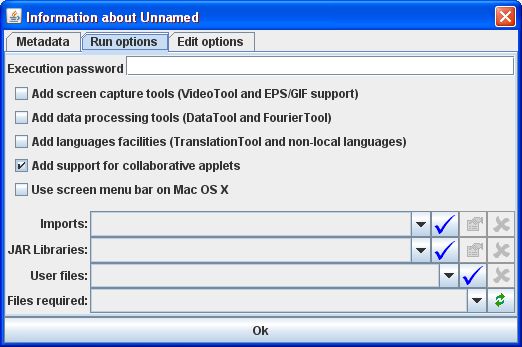 2) Download and install the EJSApp Collab Session (download from Moodle, download from Github) Moodle plugin. Note this is a block plugin (not a module) and so, it should be placed inside the /blocks folder of Moodle. Again, you can obtain more information about installing Moodle plugins here. This block can be added to your Moodle site as any other block in Moodle. More information about blocks can be found here. Once you add the EJSApp Collab Session block to a course in which you have at least one EJSApp activity with a JAR compiled with collaborative support, the Moodle block will be visible and you will be able to use it for creating collaborative working sessions. 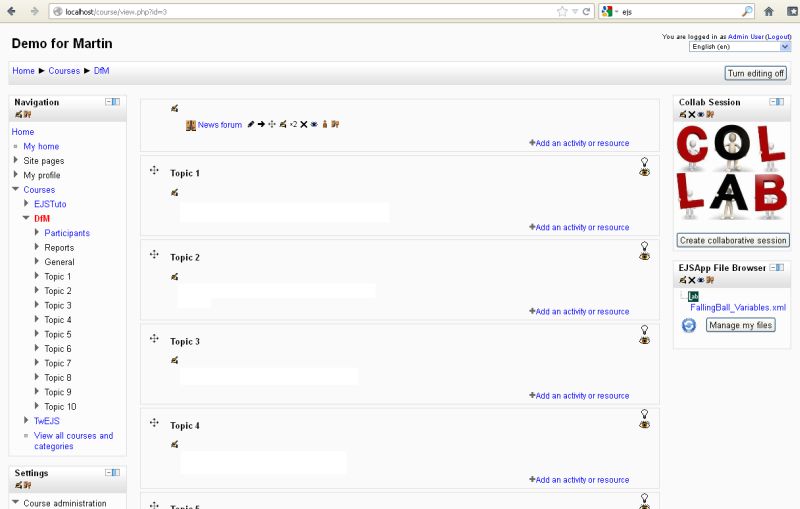 Booking system for remote laboratoriesTo add an EJS booking system instance follow the same steps described for adding an EJSApp activity but look for the EJSApp Booking System in the resource menu instead of the activity menu. In order to benefit from this tool, you need to download and install the EJSApp Booking System (download from Moodle, download from Github) Moodle plugin. Next figure shows an example of an EJSApp booking system instance in a Moodle course. 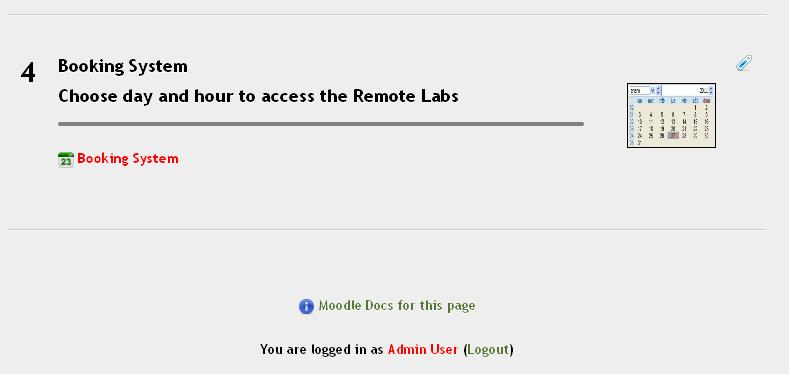 Users that access this resource can use the application to make bookings in any remote laboratory added as EJSApp activities instances in the Moodle courses they are enrolled to. 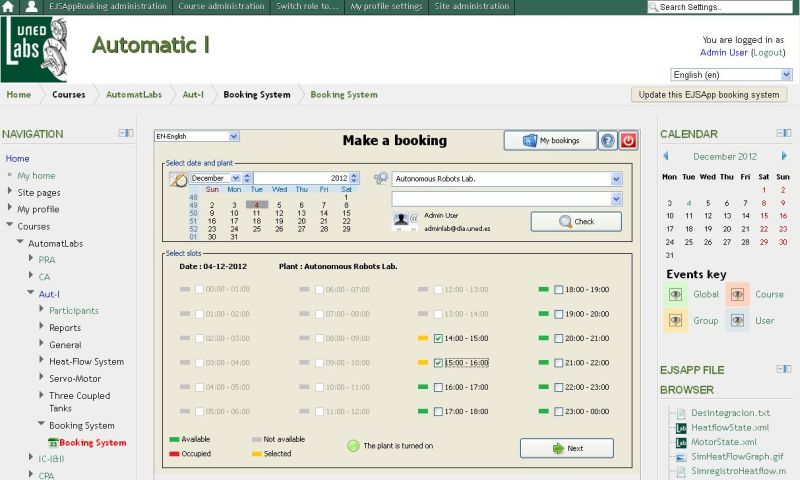 ComPADRE-OSP digital library repositoryThe OSP plugin for Moodle lets you download any EJS application stored in the OSP-Compadre library (either if they are based on Java or Javascript) directly from your Moodle. When used in combination with the EJSApp plugin, you will be able not only to access, search and download these applications but also to add them automatically to your Moodle courses as activities.  |